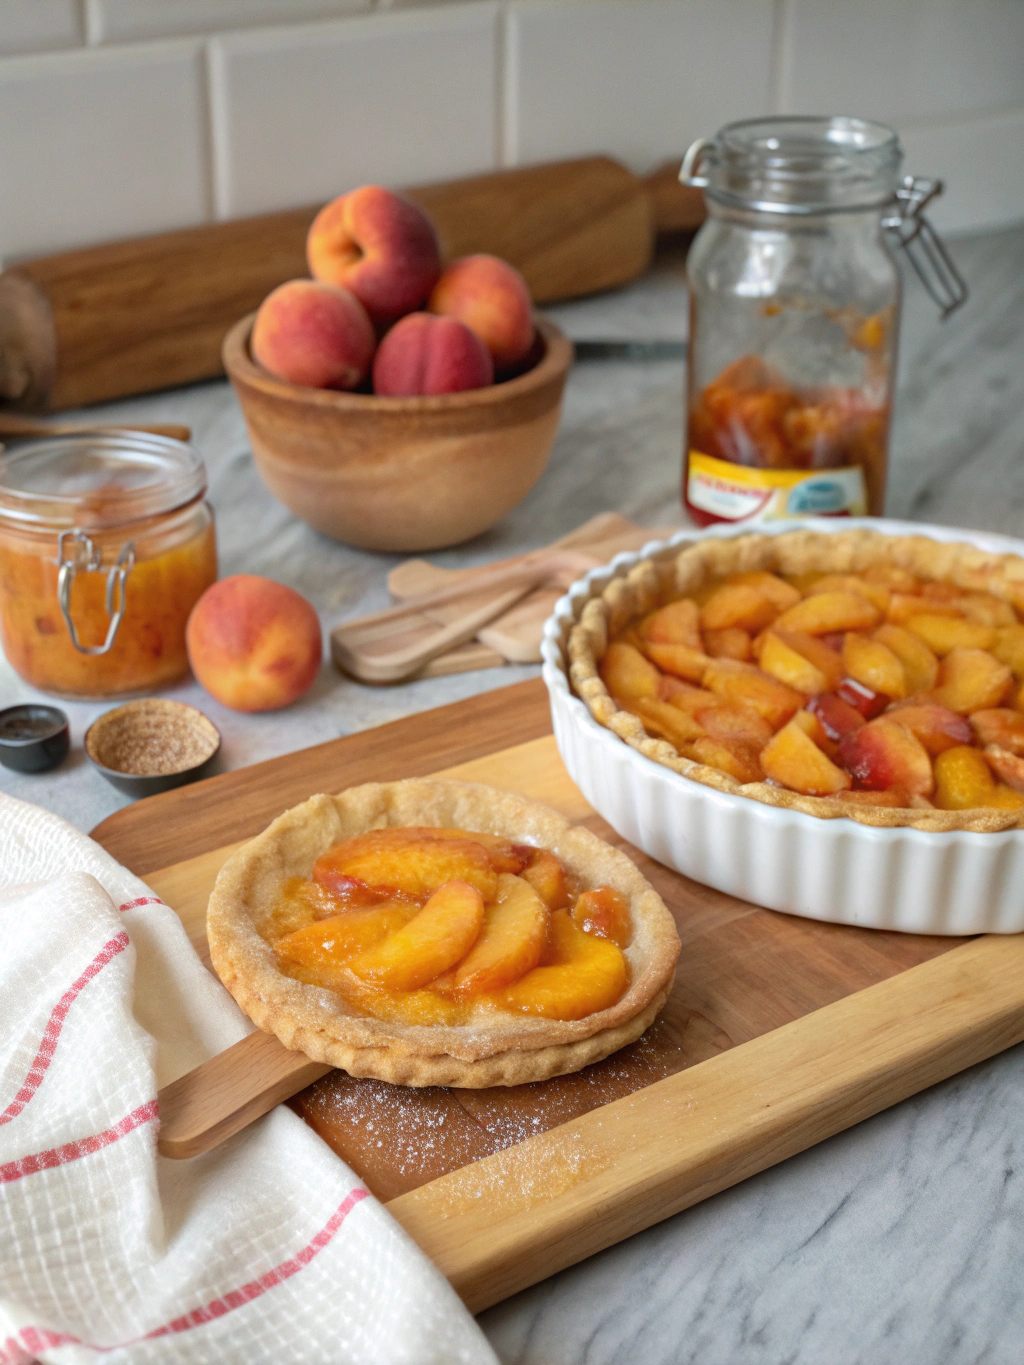
Think making a homemade pie requires fresh, hand-picked fruit, hours of prep, and complex techniques? Think again. With the right method, you can whip up a mouthwatering, oven-baked masterpiece in less than 90 minutes—and you don’t need to wait for peach season. This peach pie recipe with canned peaches makes use of pantry staples and a few clever hacks to deliver the same sweet, juicy results as traditional peach pies—without the fuss. Whether you’re a busy parent, new baker, or just craving something sweet, you’ll love how simple and satisfying this shortcut is.
Ingredients List
To make the ultimate peach pie recipe with canned peaches, gather the following:
- 2 (15 oz) cans of sliced peaches in light syrup (drained for exact control over sweetness)
- 1/2 cup granulated sugar (adjust based on peach sweetness)
- 1/4 cup brown sugar (adds depth and caramel notes)
- 1/4 cup cornstarch (thickens the filling beautifully)
- 1/2 tsp cinnamon (a spicy, aromatic lift)
- 1/8 tsp ground nutmeg (optional but delightful)
- 1 tsp vanilla extract
- 1 tbsp lemon juice (brightens the flavor)
- 2 tbsp butter (dotted on top for richness)
- 1 package refrigerated pie crust (or use homemade if you prefer)
- 1 egg (for egg wash)
- Turbinado sugar (optional, for crunch on the crust)
🧁 Substitution Tips:
- No cornstarch? Use arrowroot or all-purpose flour instead.
- Watching sugar intake? Try a monk fruit sweetener blend.
- Gluten-free? Sub in your favorite gluten-free pie shells.
Timing
– Prep Time: 15 minutes
– Cook Time: 45–50 minutes
– Rest/Chill Time: 15–20 minutes
– Total Time: ~85 minutes
That’s nearly 20% faster than your average from-scratch fruit pie recipe—without skimping on flavor or presentation!
Step 1: Prep Your Ingredients and Pie Pan
Preheat your oven to 400°F (200°C). While that’s warming up, roll one of your pie crusts into a 9-inch pie dish. Gently press it into the base and edges, and trim any extra dough hanging over the edge. Place in the fridge to stay cool while making the filling.
Pro Tip: Chilling your crust before baking helps reduce shrinkage and creates crispier edges.
Step 2: Create the Perfect Canned Peach Filling
In a large bowl, combine your drained canned peach pie slices with both sugars, cornstarch, cinnamon, nutmeg, vanilla, and lemon juice. Gently fold until peaches are coated and the mixture thickens slightly.
If you’d like a looser filling, retain 1–2 tablespoons of syrup from one can and incorporate it into the mix. Otherwise, keep it dry for a sliceable pie.
Step 3: Assemble the Pie
Take the prepared crust from the fridge and pour the peach filling into the shell. Dot the top evenly with small chunks of butter.
Top with the second crust. You can:
- Lay it as a full sheet and cut steam vents
- Create a lattice pattern for that classic pie-shop look
- Use shaped dough cutouts for creative flair
Seal the edges with a fork or your fingers. Brush the top with beaten egg and sprinkle turbinado sugar for sparkle and crunch.
Step 4: Bake Until Golden and Bubbling
Bake on the middle rack for 45–50 minutes. If the edges brown too fast, cover with foil or a pie shield after 20–25 minutes. The filling should be visibly bubbling, and the crust golden brown.
💡 Did you know? Most ovens run 10–25°F hotter or colder than their settings. If your pie isn’t bubbling after 45 mins, give it another 5–10.
Step 5: Cool to Set, Then Serve
Allow your canned peach pie filling creation to cool for 15–20 minutes before serving. This allows the juices to set so each slice holds its shape perfectly.
Nutritional Information (Per Slice – based on 8 servings)
- Calories: 310
- Sugar: 24g
- Total Fat: 13g
- Saturated Fat: 5g
- Carbohydrates: 45g
- Dietary Fiber: 2g
- Protein: 3g
- Sodium: 190mg
✨ Nutrition Tip: Reduce sugars by 25% and use whole-wheat crust for added fiber and fewer spikes in blood sugar.
Healthier Alternatives for the Recipe
Looking for a lighter take on this classic comfort food? Try these smart substitutions:
- 💧 Use peaches canned in water or juice instead of syrup to slash sugar.
- 🍯 Replace granulated sugar with coconut sugar or a stevia blend for fewer calories.
- 🥥 Swap butter for coconut oil for a dairy-free spin.
- 🌾 Opt for almond flour crust for a gluten-free, low-carb version.
- 🧡 Make it vegan by using vegan butter and skipping the egg wash (use almond milk instead).
💡 For a lower-calorie dessert, serve a smaller slice with Greek yogurt instead of whipped topping or ice cream.
Serving Suggestions
Serve your finished pie:
- 🥄 Warm with vanilla bean ice cream and a drizzle of honey
- ☁️ At room temperature with a little whipped cream and mint
- 🍦 Crumble leftovers on top of Greek yogurt for a parfait-style brunch treat
- 🧀 Alongside a soft, mild cheese like brie or mascarpone for a gourmet dessert plate
🎉 Hosting a gathering? Turn this pie into mini single-serve hand pies using muffin tins.
Common Mistakes to Avoid
Even easy recipes have their landmines! Here’s what to look out for:
- 🥫 Using peaches with too much syrup – Drain well or you’ll get a soupy pie.
- 🧂 Forgetting to taste-test filling – Ensure the right sugar balance before baking.
- 🥧 Overworking your crust – A light touch keeps it flaky.
- 🔥 Skipping the egg wash – This golden glaze adds visual appeal and texture.
- ⏰ Cutting too soon – Cooling helps juices thicken; slicing too early = pie soup!
Storing Tips for the Recipe
Keep your pie fresh and safe with these simple storage hacks:
- 🧊 Refrigerator: Store covered with plastic wrap or foil for up to 5 days. Reheat slices in a 300°F oven for 10–15 minutes to restore the crisp crust.
- ❄️ Freezer: Wrap tightly in foil and then in a freezer-safe bag. Store up to 3 months. Thaw in the fridge overnight and reheat before serving.
- 🍽️ Make-Ahead Tip: Prepare peach filling up to 2 days in advance and refrigerate. Quick for assembling on busy days!
Table of Contents
Conclusion
This peach pie recipe with canned peaches proves that you don’t need fresh fruit or elaborate skills to create a dessert that hits every sweet, juicy note. With simple pantry ingredients and five easy steps, you can enjoy the comfort of homemade peach pie any time of year.
Ready to find your slice of bliss? Try the recipe, share it with friends, and snap a pic to show off your golden masterpiece. And don’t forget to explore more quick-and-easy dessert recipes on the blog!
FAQs
Can I use syrup-packed canned peaches for this recipe?
Absolutely! Just be sure to drain them well to control sweetness. For a richer flavor, reserve 1–2 tablespoons of syrup and mix it into the filling.
Is frozen pie crust okay to use?
Yes. Store-bought crusts save time. Just thaw according to package directions and proceed with the recipe as written.
Can I make this with homemade pie crust?
Definitely! If you have a favorite buttery, flaky crust recipe, it will elevate your peach pie with canned peaches to bakery-level quality.
How do I know when the pie is done?
Look for a golden-brown crust and bubbling filling. If the center still looks soupy, give it an extra 5–10 minutes (use a crust shield if needed).
How do I prevent a soggy bottom crust?
Chilling the crust before filling + brushing it with egg white creates a barrier to keep it crisp during baking.
For more pro tips and comforting dessert inspiration, head to our main blog and bake your way to bliss with confidence! 🍑🥧