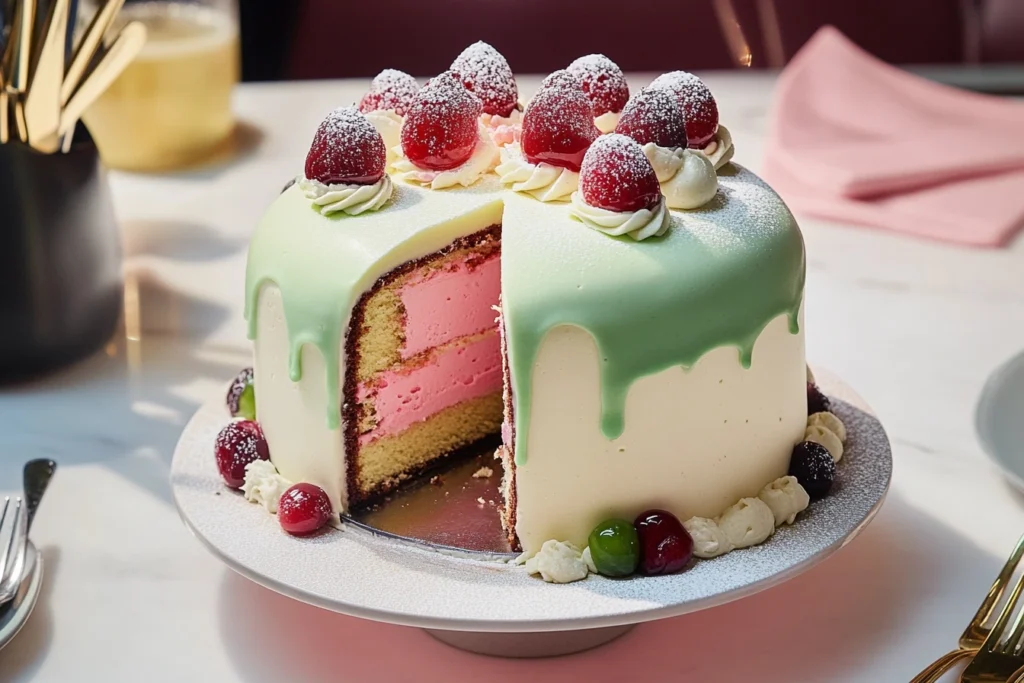
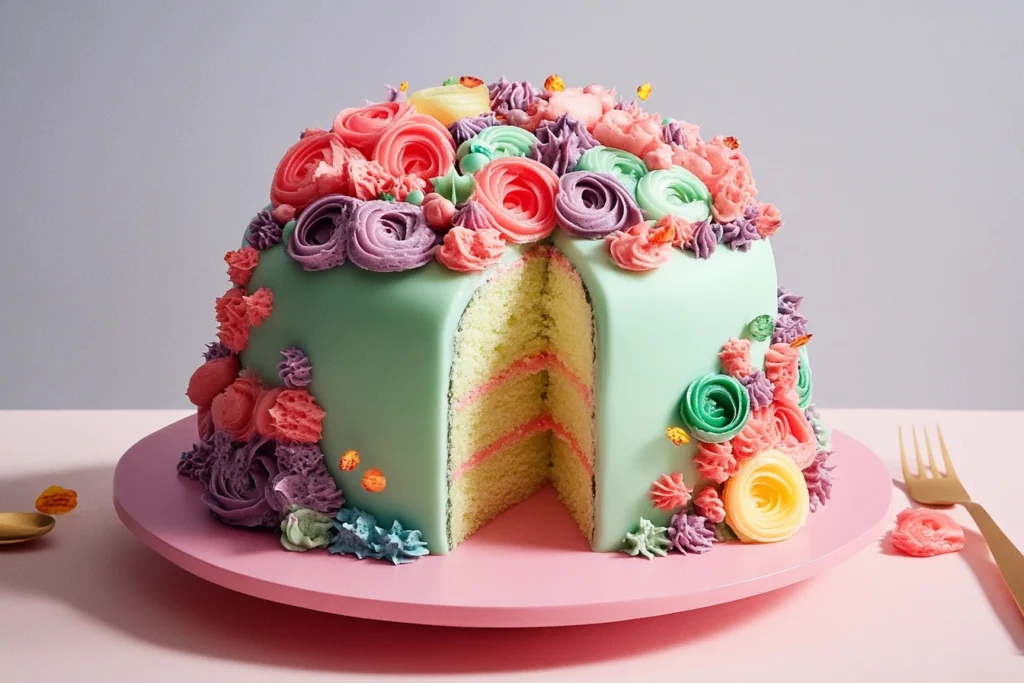
Swedish princess cake is known for its green marzipan dome, pink cream swirls, and vanilla custard layers. You can make this famous dessert at home. This guide shows you how, with easy steps for every part of the cake.
This recipe combines creamy fillings with a stunning look. It turns a complex dessert into a doable project. You’ll learn how old techniques and new tips come together for a cake that’s both tasty and beautiful.
Key Takeaways
- Learn the secrets to building the cake’s signature layers without crumbling or sinking.
- Master the balance of vanilla custard and whipped cream for a silky texture.
- Acquire tools and methods to shape the iconic marzipan dome flawlessly.
- Adapt the classic design with modern twists while respecting its Swedish roots.
- Confidence in presenting a showstopping dessert for weddings, birthdays, or holidays.
What is a Swedish Princess Cake (Prinsesstårta)?
Discover the Swedish princess cake, or prinsesstarta, a dessert icon celebrated worldwide. This colorful layered cake comes from Sweden. It has been a symbol of celebration since the 1920s.
The History and Tradition of Princess Cake
Legend says the prinsesstarta was named after a royal visit in 1926. Its design—a green marzipan dome with a pink rose—was inspired by the royal family’s preferences. Over time, it became a staple at Swedish holidays and events, blending tradition with visual delight.
Key Components of an Authentic Prinsesstarta
At its core, this cake layers three elements:
- Sponge cake: Light, airy base layers
- Vanilla custard: Creamy filling binding each tier
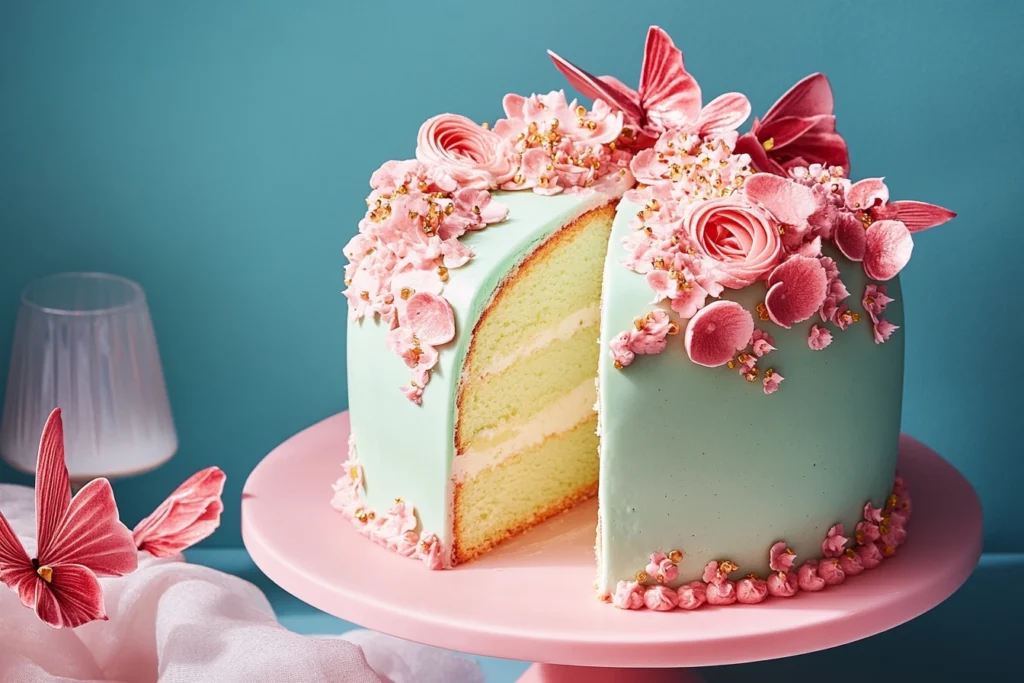
- Whipped cream and green marzipan: The signature dome and rosette
Why Princess Cakes are Perfect for Special Occasions
The prinsesstarta’s bold colors and intricate design make it a showstopper. Its vibrant layers ensure it stands out at weddings, anniversaries, or festive gatherings. Plus, its rich flavors and cultural backstory add a touch of Scandinavian elegance to any celebration.
Essential Ingredients for Your Princess Cake
Mastering princess cake recipes begins with top-notch ingredients. Each part is crucial for the cake’s layers and taste. Here’s what you’ll need:
- Sponge layers: Eggs, granulated sugar, all-purpose flour, baking powder, and unsalted butter. Use European-style butter like Plugrá for a better texture.
- Vanilla custard: Whole milk, egg yolks, sugar, cornstarch, and pure vanilla extract. Nielsen-Massey’s premium vanilla adds a rich flavor.
- Whipped cream: Heavy cream (35%–40% fat), confectioners’ sugar, and vanilla. Choose organic cream for smoother results.
- Marzipan: Almond paste (with 30%+ almond content), powdered sugar, and green food coloring. Orkla’s green marzipan sheets are great if making it from scratch seems hard.
For substitutions, use coconut milk in custard for dairy-free princess cake. Maple syrup in sponge layers works for vegan versions. Fresh ingredients are key: separate eggs at room temperature and sift dry goods to avoid lumps.
“Always buy marzipan with visible almonds—this ensures authenticity,” advises Swedish bakers. Store almond paste in the fridge for freshness.
For specialty items, check international grocery stores like World Market or online at Amazon. Using the right ingredients makes your homemade princess cake as good as bakery ones. Focus on quality for that perfect mix of creamy, sweet, and nutty layers.
Tools and Equipment You’ll Need for Baking Success
Before you start any princess cake recipe, make sure you have the right tools. The right equipment is key to getting those perfect layers and bright decorations. It’s what makes your cake look like it was made by a pro.
Baking Equipment Essentials
First, get the basics. You’ll need round 9-inch pans for even sponge layers. A stand mixer or handheld mixer makes mixing butter and custard easy. And remember:
- Measuring cups and spoons for precise ingredient ratios
- Sturdy mixing bowls (glass or metal preferred)
- An oven thermometer to monitor baking temperatures
Decoration Tools for the Perfect Finish
For that professional look, you’ll need some special tools:
- Offset spatula for smooth frosting application
- Cake turntable for 360° decoration control
- Bench scraper to trim layers and clean edges
- Piping bags and star tips (Ateco #12 and #237 recommended)
Alternatives for Hard-to Find Tools
If you can’t find certain tools, don’t worry. A flat butter knife can replace an offset spatula. Use a lazy susan or plate holder as a cake turntable. You can even make a makeshift piping bag from parchment paper.
Even a clean plastic bag cut at the corner can work as a substitute. These hacks let you make princess cakes with what you already have at home.
Preparing the Perfect Sponge Cake Layers
Creating the right sponge cake layers is key for a princess cake that looks and tastes great. Here’s how to get that light, airy texture:
- Begin with eggs and sugar at room temperature. Cold ingredients make the cake dense. Keep everything at 70°F (21°C) for the fluffiest results.
- Sift flour twice to get rid of lumps. This step ensures the cake stays light and smooth.
- Whisk egg whites with cream of tartar until stiff peaks form. Then, fold them gently in a “figure-eight” motion. This helps keep the cake airy.
Bake at 350°F (175°C) for 12-15 minutes. To check if it’s done, press the surface. It should spring back right away. Avoid overbaking to prevent dry layers. Let the layers cool on a wire rack for 10 minutes before moving them.
| Issue | Solution |
|---|---|
| Sunken center | Reduce oven temp by 25°F (13°C) next batch |
| Browning edges | Cover edges with foil during final 5 minutes |
| Sticky batter | Ensure vanilla extract is fully incorporated before folding |
For cakes taller than 3 inches, cut cooled layers in half horizontally. Use a rolling pin to flatten the tops. This helps with even filling. Always store unbaked layers in an airtight container at room temperature until you’re ready to assemble.
Creating the Signature Vanilla Custard and Whipped Cream Filling
The creamy heart of any prinsesstarta lies in its custard and whipped cream. These layers define the Swedish princess cake’s velvety texture and rich flavor. Mastering these steps ensures your cake mirrors the classic version enjoyed across Scandin.
Making Smooth, Lump-Free Custard
Start by heating milk and vanilla with a cinnamon stick. In a bowl, whisk eggs and sugar until pale. Slowly pour hot milk into eggs while mixing constantly—this tempering stops scrambling. Return mixture to the stove, stirring until thickened. Strain into a bowl, then chill until set. This custard should glide smoothly between sponge layers without gritty lumps.
Whipping Cream to Perfect Consistency
Cold cream and a clean bowl are essential. Whip chilled heavy cream with 2 tablespoons of sugar until soft peaks form. Overwhipping turns it grainy, so stop when peaks hold shape. For the prinsesstarta, split the whipped cream: half for layers, half for final coating. Store unused portions in a sealed container in the fridge.
Layering Techniques for Optimal Flavor
Alternate custard and cream between three sponge layers. Spread custard thinly with an offset spatula, leaving ½-inch edges for the sponge to show through the marzipan later. Chill between layers to firm the filling. A tip: place a cake board under your assembled layers for easy handling. Proper layering ensures each bite of your Swedish princess cake balances all elements.
Mastering the Marzipan Covering Technique
Getting the marzipan layer right is crucial for a princess cake that looks like it came from a bakery. It takes time but is worth it for a smooth, green finish. Begin by kneading the marzipan until it’s soft and easy to work with. Then, add a bit of green food coloring until it matches the mint color you want.
- Roll the marzipan into a ball and flatten it into a disk. Use a rolling pin to make it 1/8-inch thick and a bit bigger than your cake.
- Place the marzipan over the cake, smoothing it from top to bottom with wet hands to prevent air bubbles.
- Trim the extra marzipan at the base with a sharp knife, cutting at an angle to fit the cake’s shape.
“The marzipan must cling like a second skin—no wrinkles allowed.”
— Swedish bakers stress the need for a smooth finish.
| Common Issue | Fix |
|---|---|
| Cracks forming | Gently stretch and reattach the cracked area with a little water |
| Elephant skin texture | Reroll the marzipan with a light dusting of cornstarch |
| Edges lifting | Press the perimeter firmly with a spatula |
To make a how to make a princess cake that wows, make sure the marzipan sticks well to the cake. Chill the cake a bit after applying the marzipan to set it. This step turns your cake into the bright green icon known globally. Start by practicing on parchment paper to avoid mistakes. Your effort will pay off, making your cake as elegant as a Swedish classic.
Decorating Your Princess Cake for a Professional Look
Finishing your prinsesstarta with precise decorations turns your homemade creation into a masterpiece. These steps ensure your princess cake recipes mirror the iconic Swedish design, ready for any celebration.
Creating the Traditional Green Dome
- Roll marzipan into a ball, then shape into a smooth dome using wet hands to prevent sticking.
- Press the dome onto the cake’s top, trimming excess marzipan at the edges with a sharp knife.
- Smooth the surface with a warm, damp palette knife to eliminate cracks and achieve a glass-like shine.
Adding the Signature Pink Marzipan Rose
- Cut a 1-inch pink marzipan ball into eight equal pieces.
- Roll each piece into a teardrop shape, then twist the tip to form petal curves.
- Stack petals from smallest to largest around a marzipan cone, securing with water.
“The rose should tilt slightly forward, as seen in classic princess cake recipes from Swedish bakeries.”
Finishing Touches with Powdered Sugar
| Technique | Steps |
|---|---|
| Side Dusting | Sift powdered sugar over the cake’s sides using a fine mesh strainer. |
| Top Dusting | Hold the strainer 6 inches above the dome for even coverage. |
| Clean Edges | Use a dry pastry brush to remove excess sugar from the base plate. |
Try adding edible glitter for a modern twist on princess cake recipes. But keep the green-pink contrast. Practice until the design looks easy. Your final product will impress everyone.
Princess Cake Variations and Modern Twists
Make your princess cake unique by trying new things. The classic Swedish princess cake is loved by many. But, you can add your own twist to make it special for any event. Here’s how to keep it iconic while making it your own.
- Flavor Explorations: Change the strawberry jam to summer berries or add cocoa to the sponge for chocolate. Try vanilla-custard with espresso or matcha for a unique flavor.
- Size & Style Options: Make mini cakes for parties or create tiered ones for weddings. You can also make a “naked” cake or use colorful marzipan domes for a modern look.
- Dietary-Friendly Updates: Use gluten-free flour for sponge cakes, coconut whipped cream for dairy-free, or almond marzipan for vegan recipes. These changes make the cake accessible to everyone.
Whether it’s a spring brunch or a holiday party, these changes let you celebrate the Swedish princess cake in your own way. Be bold with your choices. Every twist is a tribute to the original’s creativity.
Conclusion: Enjoying Your Homemade Princess Cake
Once your princess cake is ready, serve it with care. Use a clean knife warmed between cuts for smooth slices. Pair each portion with coffee or tea to balance the cake’s sweet cream and marzipan.
For leftovers, store it tightly wrapped in the fridge. But let it sit at room temperature 30 minutes before serving again. This will enhance the texture.
Protect the marzipan dome by covering the cake loosely with parchment paper. It stays fresh up to three days if stored correctly. Prepare components like the sponge and custard two days ahead. But assemble and decorate the day of serving to keep it looking crisp.
Sharing your creation lets you celebrate Swedish tradition while surprising guests. Mention the cake’s royal inspiration and its iconic green, pink, and white colors during gatherings. Troubleshoot last-minute issues by smoothing any uneven marzipan with a toothpick or adjusting frosting swirls with a small spatula.
Mastering how to make a princess cake turns you into both baker and storyteller. This dessert isn’t just a treat—it’s a visual and cultural experience. Whether for birthdays or holidays, your version becomes a conversation starter that honors its Swedish roots while showcasing your skills. Now, slice a piece, savor the layers, and enjoy the pride of crafting a piece of culinary history.
FAQ
What is a Swedish princess cake (prinsesstårta)?
A Swedish princess cake, or prinsesstårta, is a layered dessert. It has light sponge cake, vanilla custard, and whipped cream. The cake is covered in green marzipan and is often served at special events.
How do I make a princess cake?
Making a princess cake involves several steps. First, bake light sponge cake layers. Then, make a smooth vanilla custard and whipped cream filling. Finally, cover the cake with rolled marzipan. Follow step-by-step instructions for a successful cake.
What ingredients are essential for a delicious prince cake?
Key ingredients for a princess cake include eggs, sugar, and flour for the sponge. You’ll also need milk, egg yolks, sugar, cornstarch, and vanilla for the custard. Heavy cream and sugar are needed for the whipped cream. Almond paste, powdered sugar, and food coloring are used for the marzipan.
Can I customize the flavors of my princess cake?
Yes! You can add different flavors to your princess cake. Try using fruit jams or chocolate-infused sponge layers. Seasonal variations like berry princess cake or mini versions are also great options.
How do I store leftover princess cake?
Store leftover princess cake in an airtight container in the fridge. It’s best eaten within a few days for the best taste. It can last up to a week if stored properly. Avoid freezing as it can ruin the marzipan’s texture.
What equipment do I need to bake a princess cake?
You’ll need round cake pans, a mixer, measuring tools, and mixing bowls. An oven thermometer and decorating tools like an offset spatula and piping bags are also necessary.
Is marzipan difficult to work with?
Working with marzipan can be tricky. But, with the right techniques, you can achieve a smooth finish. If you face issues like cracking, there are solutions to help you improve your marzipan skills.
Can I make a princess cake vegan or gluten-free?
Yes, you can make a princess cake vegan or gluten-free. For a vegan version, use plant-based milk and vegan butter. For gluten-free, use gluten-free flour blends and ensure all ingredients are gluten-free.